15 Best Brain Games for Seniors to Keep Memory Sharp
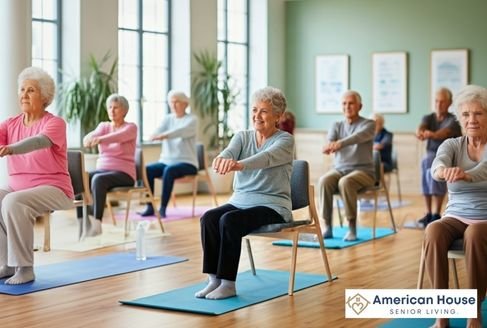
Top 12 Chair Yoga Positions for Seniors to Stay Flexible
November 30, 2025
As you become older, a lot of changes happen in your body that you can’t ignore. Your joints feel stiffer in the morning. Bending down becomes harder. Getting up from a chair takes more effort than before. These physical changes can push you toward a less active lifestyle, which only makes things worse. The good news is that chair yoga gives you an accessible way to stay flexible and strong without the challenges of traditional exercise.
Why Chair Yoga is Perfect for You
Chair yoga takes regular yoga poses and adapts them so you can do them while sitting or using a chair for support. Here’s what you can expect:
- Your joints move easier: Stiffness decreases and mobility improves
- Your muscles get stronger: Daily tasks become less challenging
- Your balance improves: You feel more stable on your feet
- Your pain reduces: Chronic aches and discomfort decrease
- Your stress drops: You feel calmer and more relaxed
- Your breathing deepens: You take fuller, more satisfying breaths
- Your sleep improves: You rest better at night
- Your confidence grows: You trust your body more
Research shows that seniors who do chair yoga twice a week see real improvements in just eight weeks. You don’t need years of practice to feel better.
What You Need to Start
You don’t need much to get started. Here’s what works best:
- A sturdy chair without arms: Kitchen chairs work perfectly
- A stable surface: Put your chair on carpet or a non-slip mat
- Comfortable clothes: Wear something that lets you move freely
- Room to move: Make sure you can stretch your arms without hitting anything
- Water within reach: Keep yourself hydrated
Choosing the Right Chair
The right chair makes your practice safer and more comfortable. When you sit, your feet should rest flat on the floor. Your knees should bend at about 90 degrees. The chair shouldn’t wobble when you shift your weight. Avoid chairs with wheels or arms.
The 12 Essential Chair Yoga Poses for Flexibility
1. Mountain Pose Sitting Down
This basic pose helps you learn proper posture and become more aware of your body.
- How you do it: Sit near the front of your chair. Put your feet flat on the floor, hip-width apart. Imagine a string pulling the top of your head up toward the ceiling. Let your shoulders relax down. Rest your hands on your thighs. Take eight slow, deep breaths.
- What it does for you: This pose fixes the poor posture you’ve developed over time. As you practice, you’ll find yourself sitting and standing straighter naturally. Better posture means less back pain and easier breathing.
- Your adjustment: If your feet don’t reach the floor, put folded towels or books under them. Your thighs should be level or slightly tilted down.
2. Cat-Cow Stretch
This gentle movement warms up your spine and releases tightness.
How you do it: Sit comfortably and put your hands on your knees. Breathe in and arch your back, pushing your chest forward. Look up slightly. Breathe out and round your spine like a cat, tucking your chin down. Keep flowing between these two positions for ten breaths.
What it does for you: This movement brings flexibility back to your spine. It also helps with digestion and eases morning stiffness. Many people feel immediate relief in their backs after doing this.
Be careful: Keep your movements small and smooth. Don’t push into extreme positions. If you have osteoporosis, be extra gentle when rounding your spine forward.
3. Arms Up Overhead
This simple stretch opens your chest and shoulders.
How you do it: Start in Mountain Pose. Breathe in as you lift your arms out to the sides and up. If it feels okay, press your palms together above your head. Keep your shoulders down. Hold for five breaths. Lower your arms as you breathe out.
What it does for you: This keeps your shoulders mobile so you can reach high shelves or wash your hair easily. It also opens your chest, which helps you breathe better.
Make it easier: If both arms up hurts, lift one arm at a time. Or just lift your arms partway, maybe to shoulder height.
4. Neck Stretches
These gentle movements ease neck tension and help you look around more easily.
- How you do it: Sit up straight. Slowly tip your right ear toward your right shoulder. Feel the stretch on the left side of your neck. Hold for four breaths. Come back to center and repeat on the left. Then drop your chin gently toward your chest for four breaths. Finally, look up slightly for two breaths, but don’t drop your head all the way back.
- What it does for you: These stretches release tension from stress or poor posture. Better neck mobility makes driving safer and helps you turn to see things around you.
Important warning: Move very slowly with your neck. Stop right away if you feel dizzy, get shooting pains down your arms, or hear grinding sounds. See a doctor if this happens.
5. Forward Fold in Your Chair
This calming pose stretches your back and helps you relax.
How you do it: Sit near the front of your chair with your feet flat. Breathe in to sit taller. As you breathe out, bend forward from your hips. Let your body fold over your thighs as far as feels comfortable. Your arms can hang down or rest on your legs. Breathe deeply for six to eight times. To come up, put your hands on your thighs and slowly roll up.
What it does for you: This stretches your hamstrings, calves, and entire back. It also calms your nervous system and helps you feel more relaxed. Many people find this releases emotional tension too.
Change it if needed: If you have high blood pressure or glaucoma, don’t fold forward deeply. Just rest your forearms on your thighs and lean forward a little bit.
6. Seated Twist
Twisting keeps your spine flexible so you can turn to look behind you or reach for things.
- How you do it: Turn sideways on your chair so the chair back is on your right. Keep both feet flat. Hold the chair back with both hands. Breathe in to sit taller. As you breathe out, gently turn your body to the right. Don’t force it. Hold for six breaths. Slowly unwind and switch to the other side.
- What it does for you: Twisting keeps your spine mobile and can ease lower back pain. It also helps with digestion. Regular twisting prevents the stiffness that makes simple tasks harder.
- Stay safe: Never twist quickly or jerk your body around. Move slowly and smoothly. If you have disk problems in your back, ask your doctor before doing twists.
7. Hip Opener Pose
This powerful stretch can make walking more comfortable and reduce lower back pain.
How you do it: Sit up straight. Lift your right foot and put your right ankle on top of your left thigh, just above the knee. Your right knee points out to the side. Flex your right foot. If this already stretches your hip, stay sitting upright. For more stretch, lean forward from your hips while keeping your back straight. Breathe for eight to ten times. Carefully release and switch legs.
What it does for you: Tight hips cause lower back pain and affect how you walk. This pose loosens your hips, which often eliminates back pain you thought would never go away.
Be extra careful: If you have knee problems or an artificial hip, keep this stretch very gentle. Never push your raised knee down with your hand. Put a folded towel under your ankle if you need support.
8. Eagle Arms
This arm position releases tension between your shoulder blades.
How you do it: Stretch your arms straight forward at shoulder level. Cross your left arm over your right at the elbows. Bend both elbows and try to bring your palms together. If they don’t touch, that’s fine. Gently lift your elbows and pull your hands slightly away from your face. Hold for six breaths. Release and switch arms.
What it does for you: This targets the tight spots between your shoulder blades where many people hold tension. Regular practice can get rid of that nagging upper back pain.
Easier option: If crossing your arms feels too complicated, just hug yourself instead. Put each hand on the opposite shoulder blade and squeeze gently.
9. Shoulder Opener
This backward reach fixes the forward slump you develop from years of sitting.
How you do it: Sit near the front of your chair. Reach both arms out to your sides at shoulder height. As you breathe out, sweep your arms behind you, bending your elbows a bit. Try to bring your shoulder blades together. If you can, clasp your hands behind your back. Otherwise, just reach back as far as feels good. Lift your chest gently. Hold for six to eight breaths.
What it does for you: This opens your chest and stretches the front of your shoulders. Better posture makes breathing easier, reduces pain, and even improves your mood.
Use help: If you can’t reach your hands together behind you, hold a towel between them. This lets you adjust how close your hands are.
10. Warrior Pose in Chair
This strengthening pose builds leg muscles and stretches your hips.
How you do it: Sit toward the front of your chair. Step your left foot back and place it flat on the floor. Your right knee stays bent with your foot under your knee. Put your hands on your hips. If you feel steady, raise both arms up with palms facing each other. Hold for six to eight breaths. Bring your back foot forward and repeat with the other leg back.
What it does for you: This strengthens your leg muscles and stretches tight hip flexors. Stronger legs help you climb stairs and stand up easily. The hip stretch can relieve lower back pain.
Stay stable: Only put your back foot as far back as you can while staying balanced. Hold the chair with one hand if needed. As you get stronger, you can put your foot farther back.
11. Side Stretch
This sideways bend stretches the muscles along your sides.
How you do it: Sit tall in Mountain Pose. Lift your right arm straight up. Keep your left hand on the seat for support. As you breathe out, lean gently to the left. Make sure both hips stay on the seat. Feel the stretch all along your right side. Hold for five breaths. Come back to center and switch sides.
What it does for you: Side bending stretches muscles that rarely get stretched. This improves your breathing and helps prevent the sideways curve some people develop in their spine. It also helps you reach across your body easier.
Check your form: Make sure you’re bending straight to the side, not forward or backward. Imagine your body moving between two walls.
12. Ankle Circles
These simple foot movements are crucial for balance and circulation.
How you do it: Stay seated. Lift your right foot a few inches up. Slowly circle your ankle, making big circles. Do six circles one way, then six the other way. Next, point your toes away from you, then flex your foot to bring your toes toward you. Do this twelve times. Put your right foot down and repeat with your left foot.
What it does for you: These movements improve blood flow in your lower legs. Better ankle mobility helps your balance and the way you walk. Flexible ankles help you walk on uneven ground safely.
Why this matters: Your ankles are your first defense against falls. When they move freely, you can make quick adjustments to stay upright when you stumble or step on something uneven.
Building Your Practice
Start Small
When you’re new to chair yoga, don’t try to do all twelve poses at once. Pick three or four that feel good and practice those for five minutes each day. As you get comfortable, add more poses and practice for longer.
Practice Every Day
Your body loves routine. Try to practice at the same time each day. Some people like morning yoga to loosen up. Others prefer afternoon or evening. Pick whatever time works for you and stick with it.
Listen to What Your Body Tells You
You should feel gentle stretching, but never sharp pain. If something hurts, stop or skip that pose. Some discomfort is normal when you stretch tight muscles, but you need to know the difference between good stretch and pain.
Breathe Right
Your breath is important in yoga. Breathe slowly and deeply through your nose if you can. Good breathing helps your muscles relax and stretch better. It also calms you down.
Common Questions You Might Have
How often should you do chair yoga?
You can do chair yoga every day if you want. Most experts say to start with two or three times a week. Even 15 minutes a few times weekly helps a lot.
Does chair yoga help you lose weight?
Chair yoga can help with weight management when you also eat healthy. It burns fewer calories than running, but it builds muscle and gets you moving. One hour might burn 50 to 200 calories.
Is chair yoga safe if you have arthritis?
Yes, chair yoga is great for arthritis. The gentle movements don’t stress your joints but they do improve flexibility and reduce pain. Studies show it really helps with arthritis pain.
Do you need special equipment?
You only need a sturdy chair and comfortable clothes. That’s it. Things like yoga blocks or towels can help but you don’t have to have them.
Can you do chair yoga with balance problems?
Absolutely. Chair yoga is perfect if you have balance issues because the chair supports you. You can practice without worrying about falling.
How long before you see results?
Many people feel better after just a few sessions. Big changes in strength and balance usually show up after four to eight weeks of regular practice.
Conclusion
You now know twelve chair yoga poses that can help you stay flexible. Don’t wait for the perfect time. Start today with just one or two poses. Use whatever chair you’re sitting in right now.
Try Mountain Pose and Cat-Cow Stretch for five minutes. Tomorrow, add another pose. By next week, you’ll have a routine that can really change how you feel.
Your body wants to stay flexible and strong. Give it what it needs through regular chair yoga practice. Start right now.